
 Polski
 Čeština
 Slovenčina
 Deutsch
 Italiano
 Español
How to register and set up an account on Worten: A step-by-step guide
Registering and configuring your Worten account is the vital first step to launching your sales journey on this highly popular marketplace. In this article, we will walk you through the seller registration process, outline the exact compliance documents you need, and show you how to configure your shop profile to get your business live as quickly as possible. If you are new to selling on Worten, t
 Konrad WadowskiE-commerce Sales Expert
Expanding your e-commerce business to a major marketplace like Worten is an excellent growth strategy, but navigating the initial setup can often feel a little overwhelming. We frequently see clients get bogged down during the registration and account configuration stages – whether it is gathering the right corporate documents, fine-tuning backend settings, or setting up technical integrations.
It is completely normal to face a few hurdles here! That is why we have put together this straightforward, practical guide to help you bypass the usual frustrations and get your storefront live without costly delays. We know that time is your most valuable asset, and early mistakes can mean missed revenue. With our guidance, you can transform these launch challenges into streamlined profits and secure a powerful new revenue stream without the unneeded stress.
Setting up an account on Worten.pt
Step 1: Start of the registration process
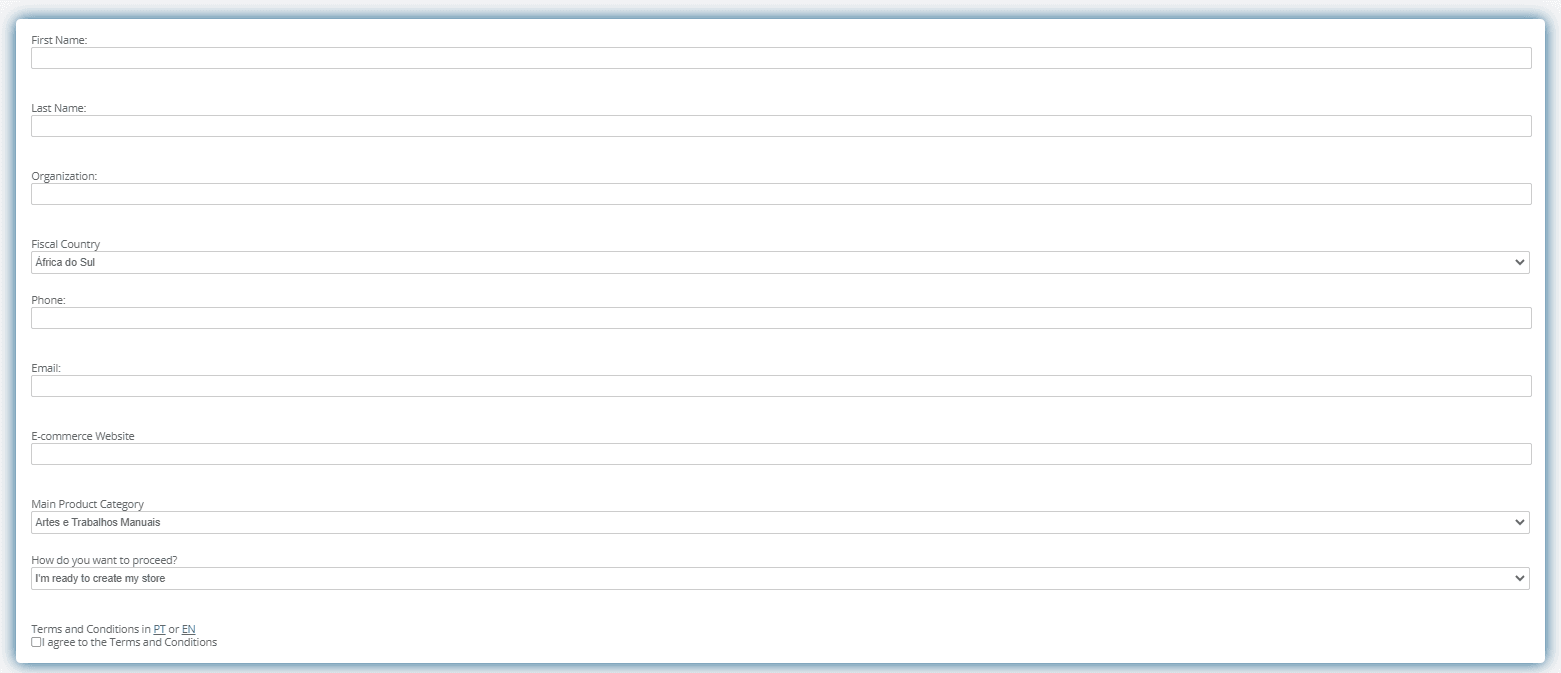
To begin the registration process, head over to the official seller registration page:
https://www.worten.pt/marketplace/vender-na-worten
Fill in the following initial details:
- First name and last name
- Organization
- Fiscal country
- Phone number
- Email address
- E-commerce website
- Main product category
- Onboarding preference: Select either “I am ready to create my store” or “I would like to know more about the commercial terms. I want to be contacted” (if you require dedicated assistance from an onboarding manager).
Click ‘Submit’.
Setting up an account on Worten.pt
Step 2: Completing the application form
Shortly after submitting the initial form, you will receive an email containing a link to the main application form.
(Note: You can easily change the form’s display language using the drop-down menu in the top-right corner).
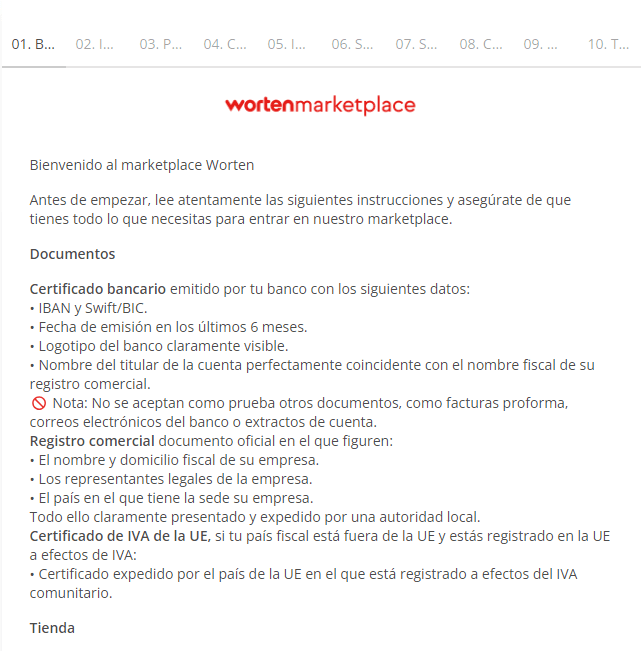
Next, you will receive an email with a link to the form.
Required documents to prepare:
- Bank account number
- Bank certificate / statement (issued within the last 6 months confirming account ownership)
- Company registration extract (e.g., Companies House certificate or relevant national trade register extract)
- Valid ID for all legal representatives (passport or driving licence)
- Articles of Association (or company partnership agreement)
Click ‘Next’.
Fiscal information
- Country of registration
- VAT number (including your country’s prefix)
- Fiscal name
- Registered business address
At this stage, upload your digital copies of the Bank Certificate and Commercial Register details.
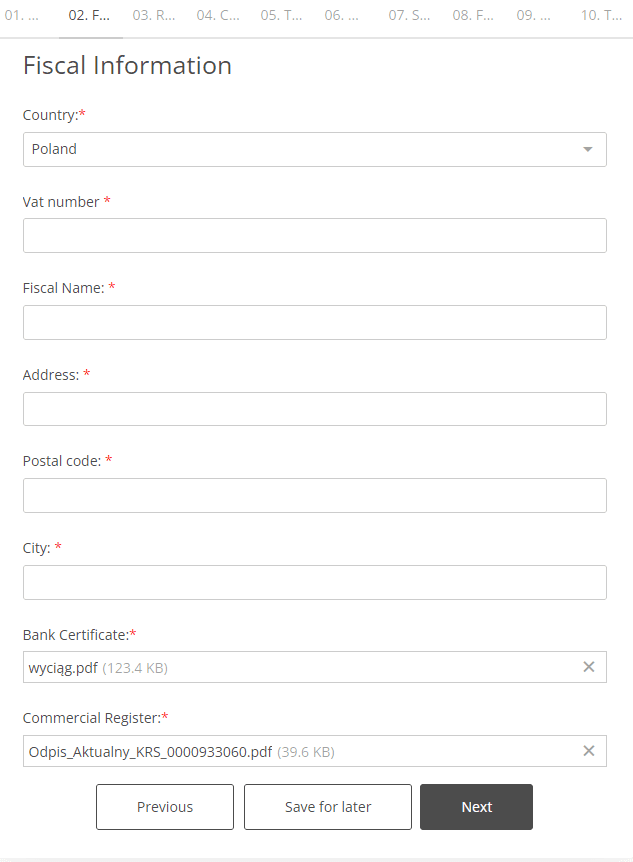
Fiscal information
Click ‘Next’.
Commercial information
- Shop name: The customer-facing name of your storefront.
- Shop description: You can write this in English; it will automatically be translated into Portuguese (PT) and Spanish (ES).
- Shipping country: The country from which your products will be dispatched.
- Customer support language(s): The language your team will use to handle customer queries.
- Product upload method: How you plan to list items (e.g., manually, via CSV, or API integration).
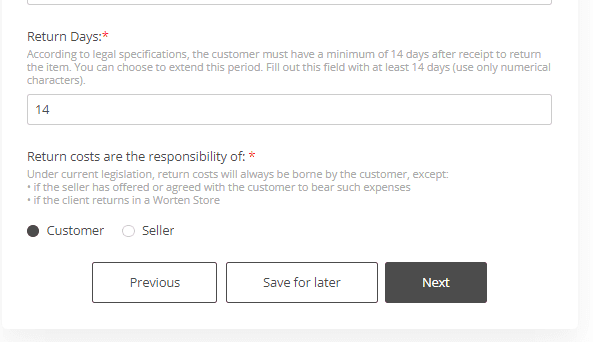
- Store policies: Your privacy policy, return policy (you must enter number of days), and details on who covers return costs.
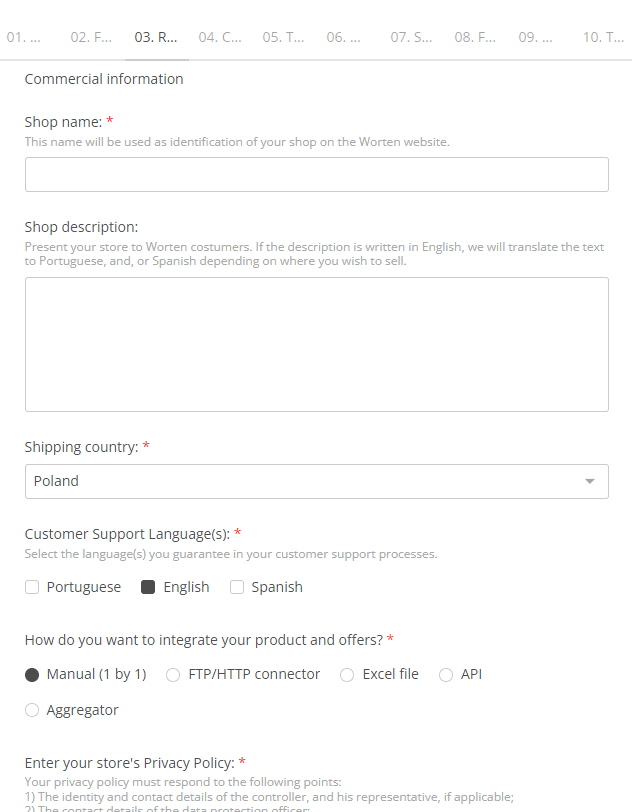
Shop information details
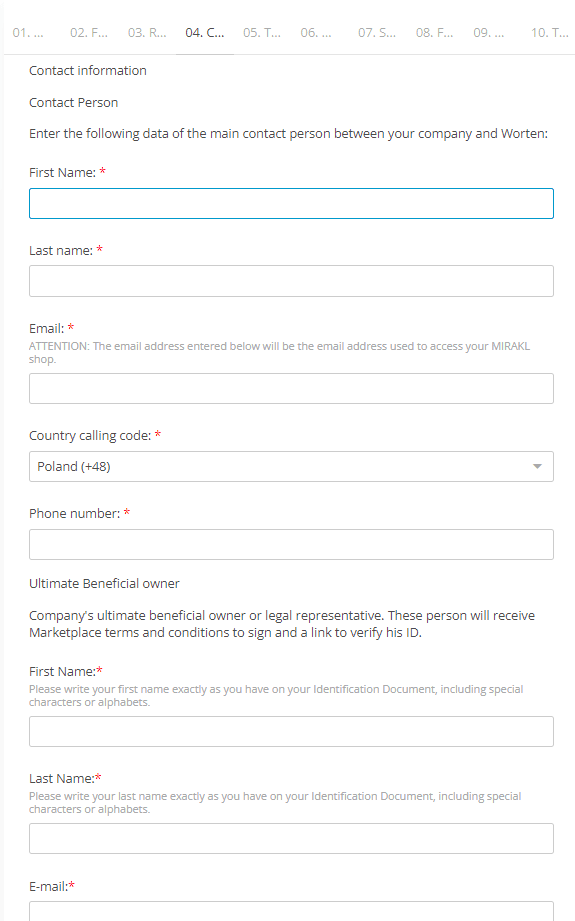
Contact details and Ultimate Beneficial Owners (UBOs)
Shipping configuration
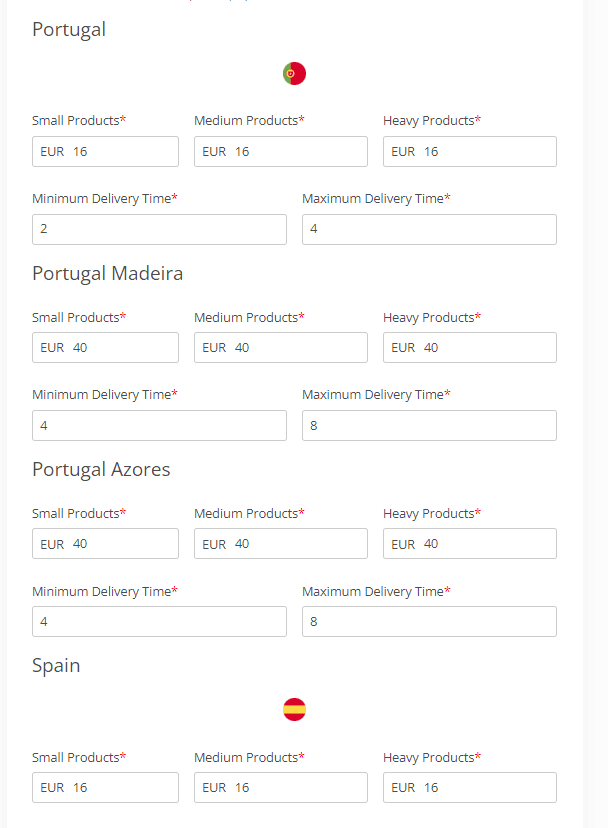
Next, you will define your baseline logistics settings.
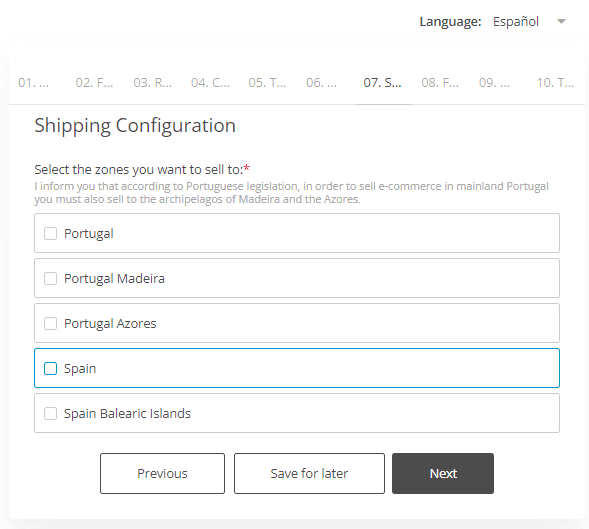
Shipping configuration
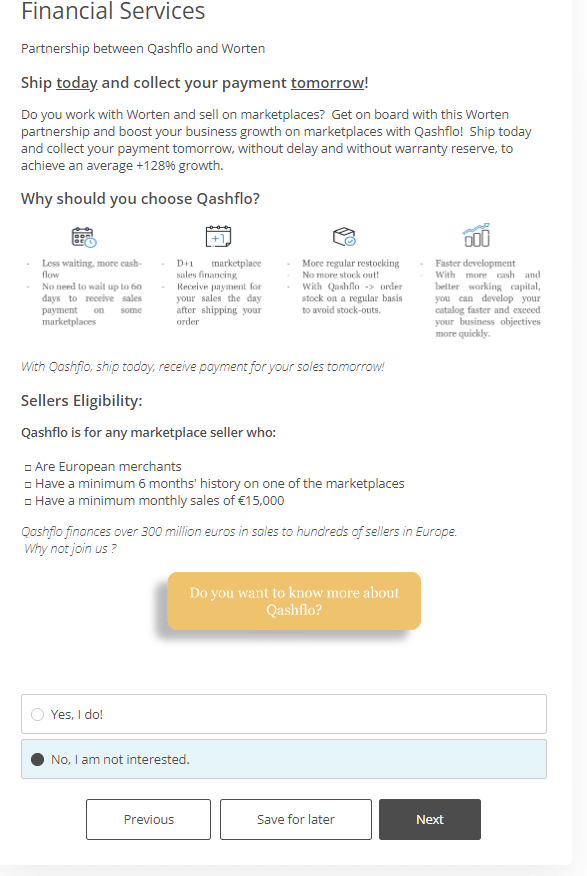
Fulfillment services
Following the logistics section, you will see prompts asking if you would like to opt into Worten’s proprietary Fulfilment services or their specialized financial services. Select the options that align best with your current business strategy. Once completed, you will be presented with a full form preview to review and confirm all submitted data.
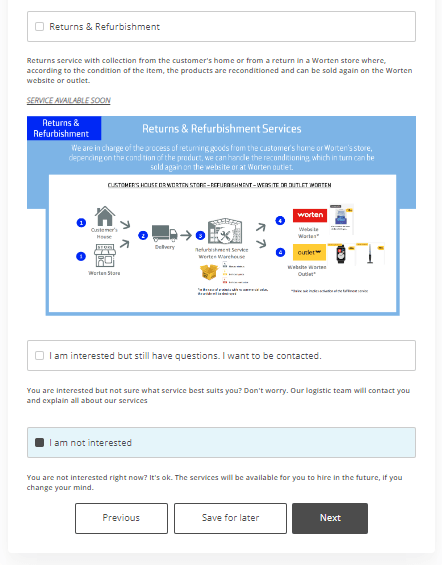
Fulfilment services
Financial services
Identity verification (KYC)
The next step involves a standard identity check. You will receive an automated email requesting a secure identity verification. You will need to upload high-quality photos of the front and back of your ID (passport, driving licence, or national identity card) and complete a quick video facial scan.
Once your identity is successfully verified, you will receive a confirmation email stating that your shop has been approved and your user profile is live.
Email requesting identity verification
Verification process
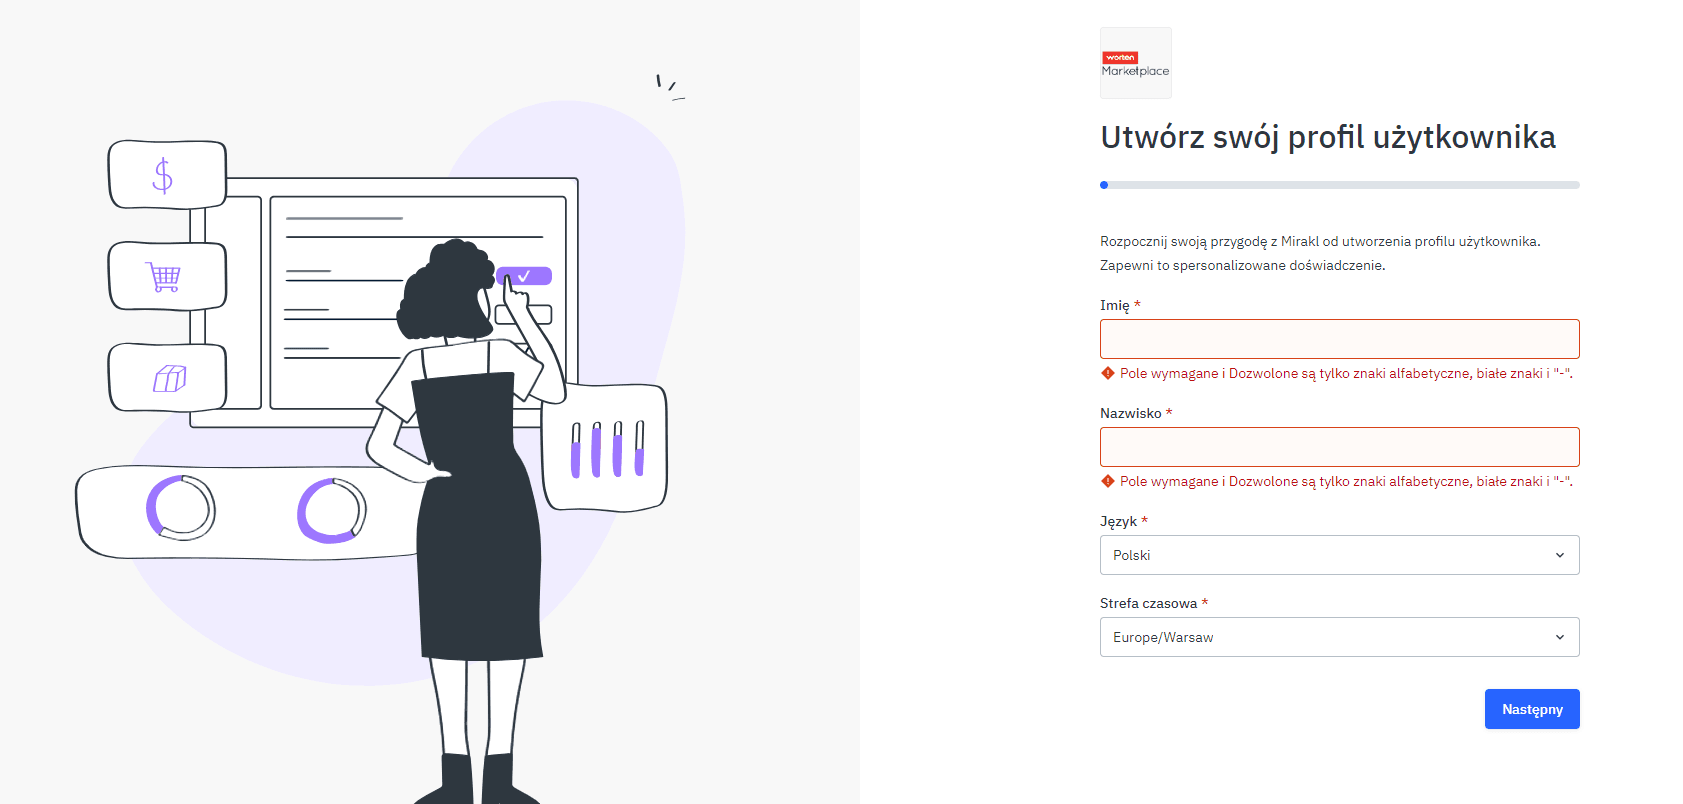
User profile
Finally, the official marketplace agreement documents will be emailed to you for digital signature. As soon as you sign and Worten validates your uploaded corporate files, your account will be fully activated for selling.
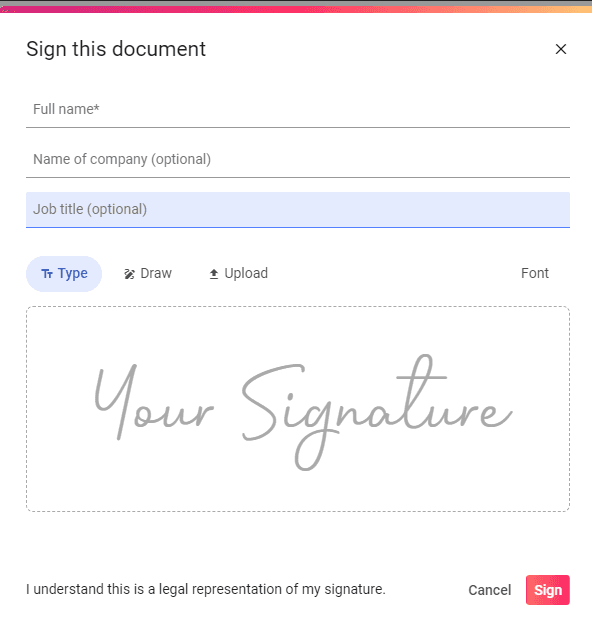
Documents for digital signature
Configuring your Worten.pt account
Immediately after your account is activated, your main seller dashboard will highlight several key configuration areas that must be fully completed before you launch.
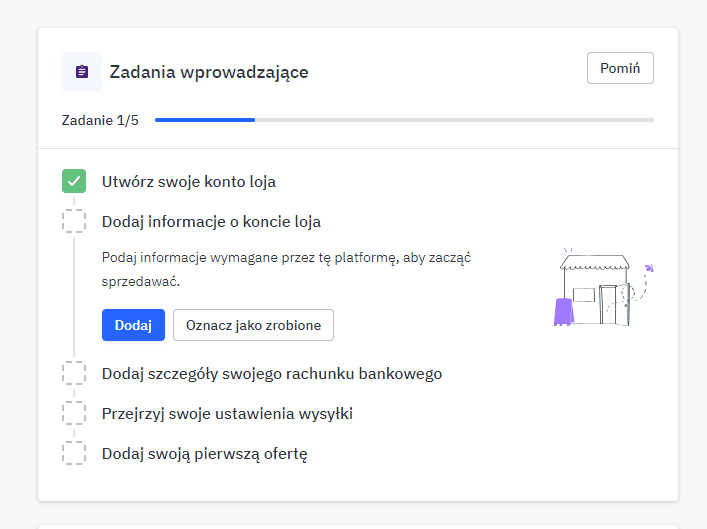
Configuring your Worten.pt account
Account details
Navigating to Settings -> Shop -> My Account, you will find that most fields are already pre-filled with the data from your registration form.
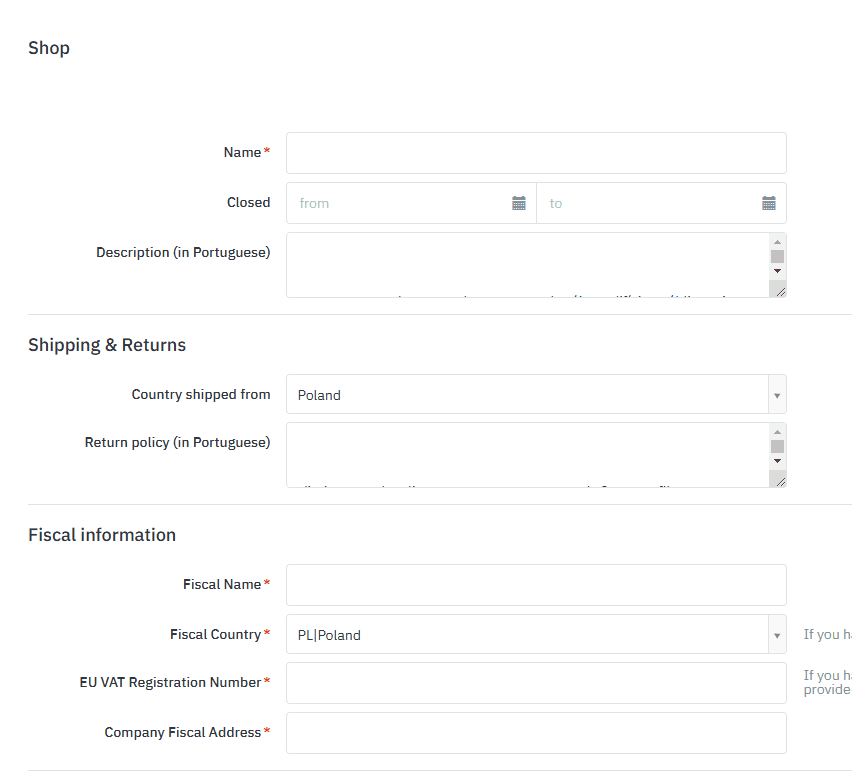
Account details overview
This section contains your:
- Shop name
- Shop description
- Return policy
- Fiscal information
- Privacy policy
- Documents section (where you can re-upload or update documents if necessary)
To complete manually, you must add:
- Logistics addresses (if your warehouse or return addresses differ from your registered business address)
- Extended Producer Responsibility (EPR) registration number for batteries (if applicable to your product range)
- Shop logo (192x192px in JPG or PNG format)
- Shop banner (1312x190px in JPG or PNG format)
Key settings tabs to configure
- Business calendar (Settings -> Shop -> Business calendar): A list of public and operational holidays. Note that you can only toggle existing holidays from a non-working day to an active working day if your logistics operate through them.
- Contact details (Settings -> Shop -> Contact details): Your customer service and operational contact points.
- Bank account details (Settings -> Shop -> Bank account details): The verified bank account for your payouts.
- Billing information (Settings -> Shop -> Billing information): Invoicing details for corporate tax purposes.
- Channels (Settings -> Shop -> Channels): Here you can choose your active sales regions, specifically toggling the Portuguese (PT) and Spanish (ES) markets.
- Imports (Settings -> Shop -> Imports): Configuration tools for automated reporting, FTP access, and XML product feeds.
- CSV settings (Settings -> Shop -> CSV settings): Customization options for uploading and exporting data via CSV files.
Shipping configuration
Settings -> Shipping -> Shipping charges
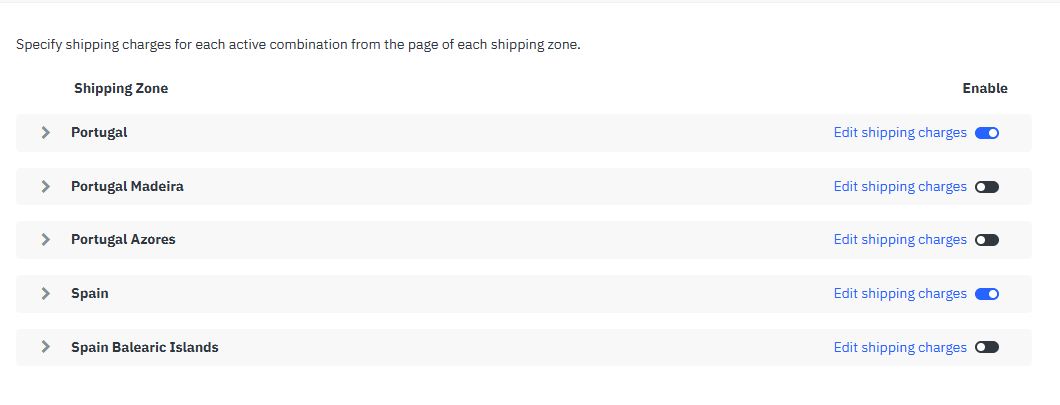
- Shipping charges: Set up your custom shipping rate cards, broken down by shipping tiers such as standard delivery, express shipping, or bulky goods.
- Shipping options (Settings -> Shipping -> Shipping options): Define your average customer delivery timelines and set your daily order cut-off times.
- Carriers (Settings -> Shipping -> Carriers): Link and configure your supported regional and international courier services.
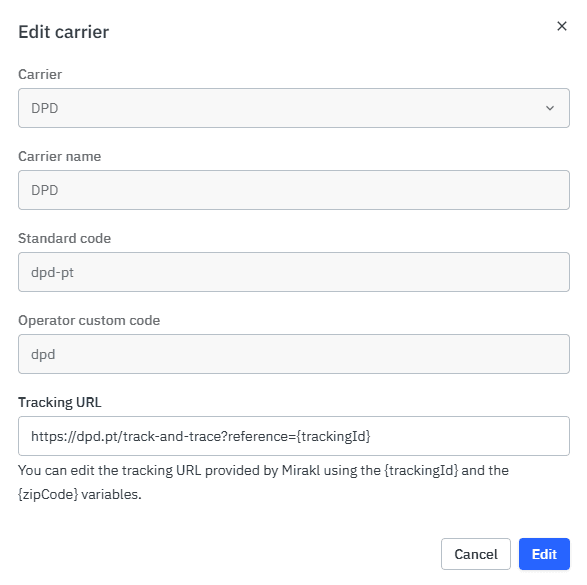
Delivery timeline
Configuring shipping charges
- Warehouse (Settings -> Shipping -> Warehouse): Input the specific warehouse location from which your inventory will be dispatched to customers.
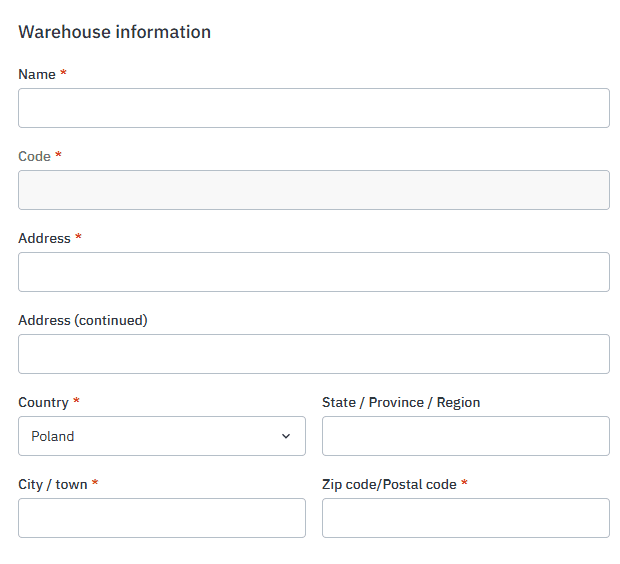
Warehouse information
Users and integration
- Users (Settings -> Users): Add team members, manage account permissions, and assign roles for your staff.

User management interface
- Catalog mapping (Settings -> Catalog mapping): If you are managing your product database via an API integration, this section allows you to map your inventory attributes to Worten’s category tree smoothly.
Additional platform insights
Under the Settings -> Platform tab, you can monitor the day-to-day mechanics of your account:
- Shipping: A quick review tool for your current shipping cost matrix.
- Commissions: A complete breakdown of marketplace referral fees per specific product category.
- Billing & Payments: Transparent overviews of your platform subscription fees, bi-monthly payouts, processed customer refunds, and tax breakdowns.
- Offer conditions: Allows you to configure additional item conditions if you plan to sell refurbished, used, or open-box goods alongside brand-new stock.
- Business days and holidays: A birds-eye view of your operational calendar.
- Terms of Service: Access to the digital copy of the signed marketplace user agreement.
Summary
To wrap up, registering and configuring an account on Worten is a detailed process that demands careful attention to compliance and settings, but following this structured guide makes the journey highly manageable. Ensuring your account is set up perfectly from day one is vital to creating a stable foundation for efficient, long-term sales.
If you want to guarantee that your store functions flawlessly from the very first click, and want to scale your cross-border business without the typical operational headaches – we are here to help. Book a free consultation with our marketplace experts today. Together, we will optimize your Worten launch strategy so you can unlock the full commercial potential of the Iberian market!
Did you find this article helpful?
This article has no ratings yet — be the first.
Autor
Konrad Wadowski
E-commerce Sales Expert
I spent nearly a decade with Adidas Poland, progressing from the shop floor to technology training and eventually becoming a Deputy Store Manager. Seeking a new challenge, I joined Mikesport, where I gained my first experience with Allegro, Amazon, and eBay. I then spent three years at Green Cell, consolidating my marketplace knowledge while spearheading launches on new platforms like eMAG, Cdiscount, Rakuten, and Fnac.